


In modern security surveillance systems, IP cameras can provide high-definition video surveillance with flexible configuration options. One of the important configurations is to ftp setting ip camera in order to upload the recorded video or images to a remote location in real time. This article will introduce how to ftp settings for ip camera so that you can easily manage and store surveillance data.
Why Is IP Camera FTP Settings?
FTP (File Transfer Protocol) is a standard network protocol used to transfer files between computers. Configuring an IP camera to upload recordings to an FTP server has several advantages:
- Remote Storage: You can upload monitoring data to a remote server so that even if the local device is damaged or stolen, the recorded data will be protected.
- Capacity Expansion: FTP servers can provide large amounts of storage space and can be easily expanded to meet your monitoring needs.
- Flexibility: You can access uploaded files as needed, whether through the web interface, FTP client or other means.
FTP Server Settings For IP Camera Typically Involves The Following Steps
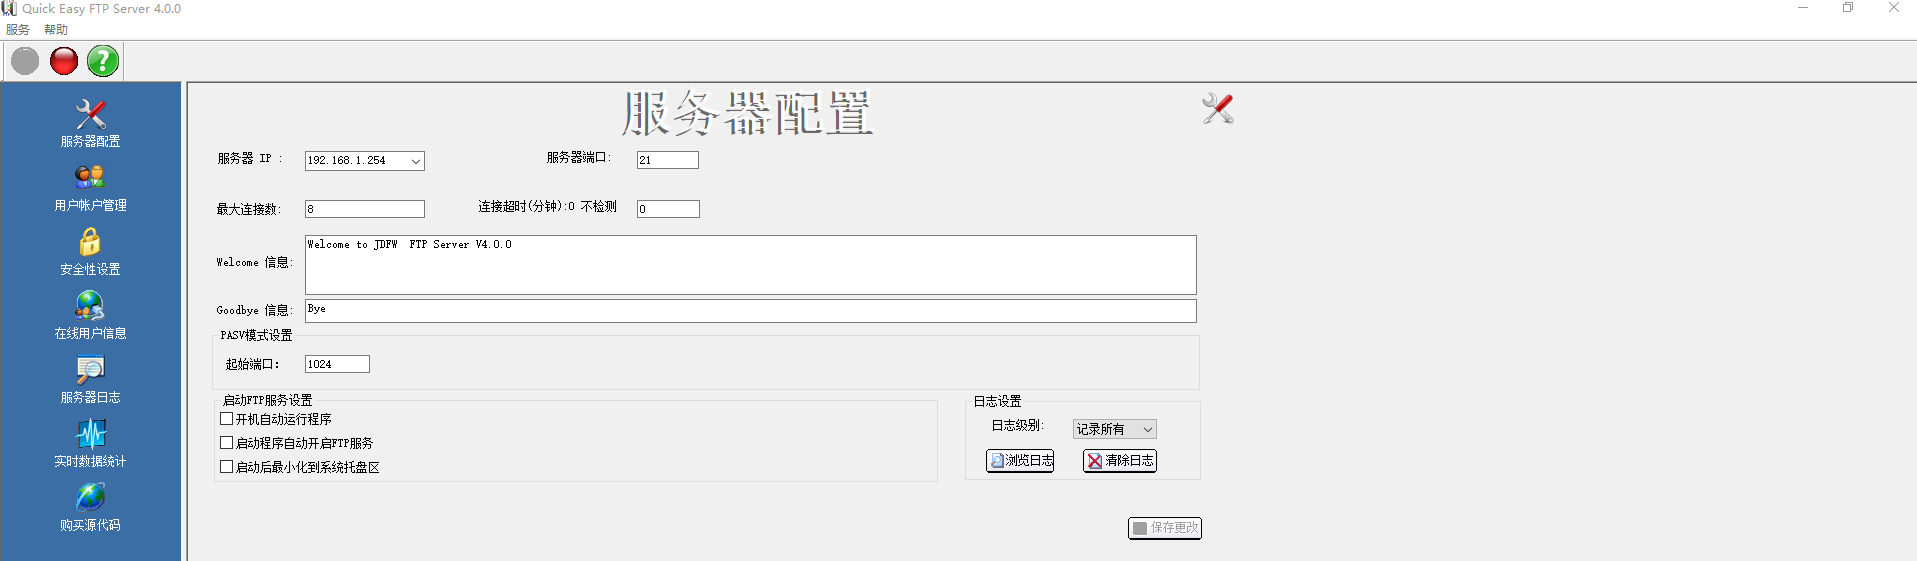
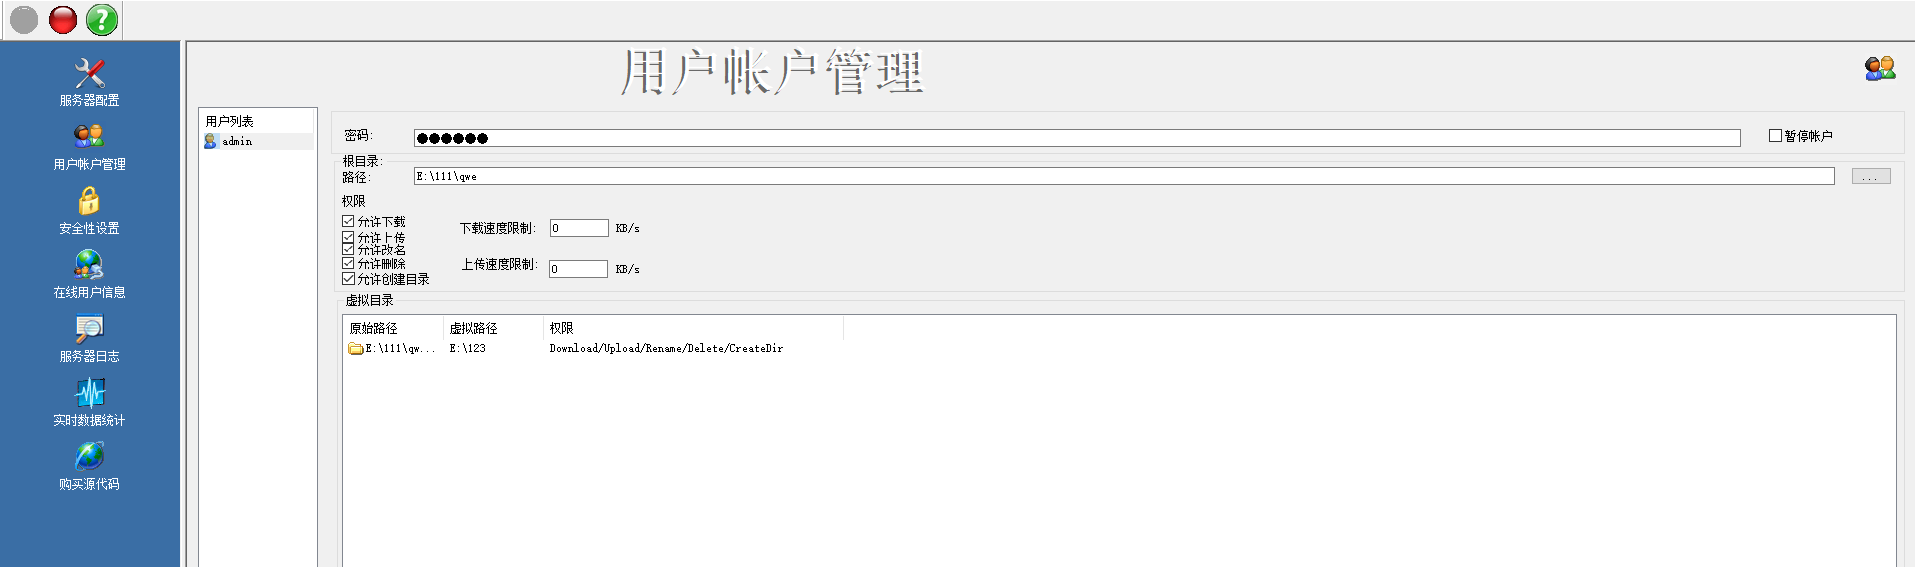
1. Open FTP server and setting FTP IP address, port, user name and password.
2. Open IE browser, enter camera IP and login in camera web.

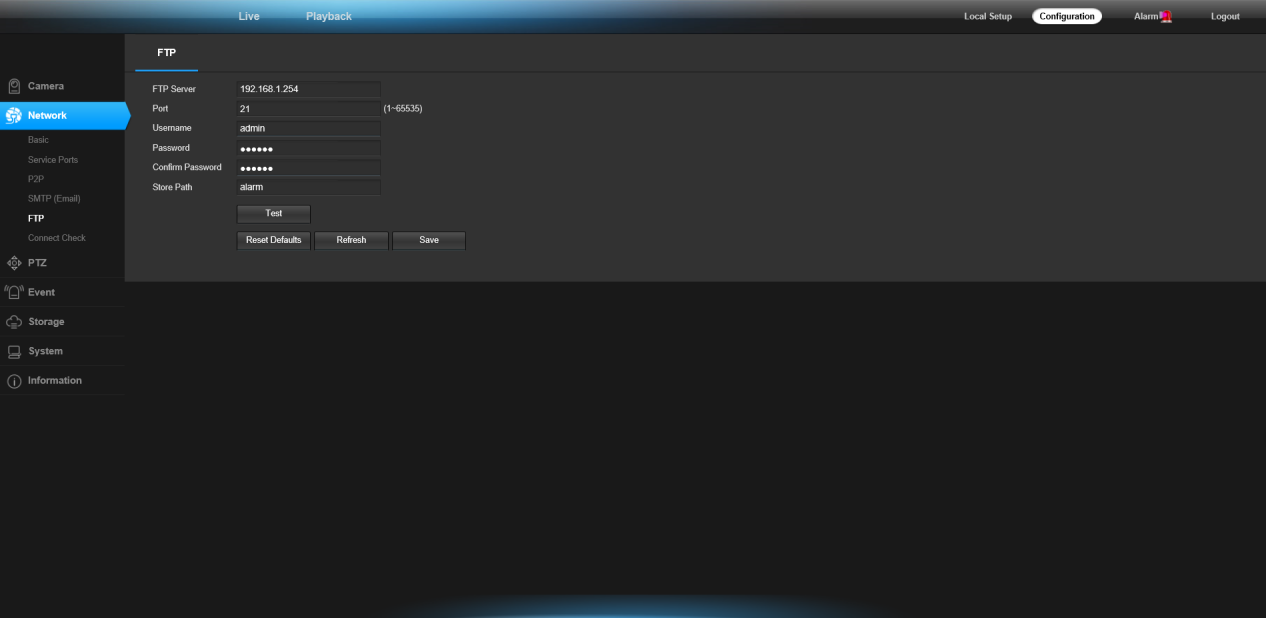
3. Click “configuration-Network-FTP”.
- Enter FTP Server IP address
- Enter FTP server port
- Enter user name and password
- Enter file name to be sent
- Click “save” to apply and click “Test” to verify that the setup is successful
By properly ip camera ftp settings, you can achieve secure storage and remote access of surveillance data, adding a layer of reliability and flexibility to your surveillance security system.